Tuesday, July 26, 2016

Eldar "Woe" Walkers hit the table.

Conundrum.  Hate multi-part metal models.  Hate new plastic War Walker.

Solution: Buy a bunch of old metal war walkers...and do a terrible job assembling/painting them.

This was a bit of a "I know better" moment for me.  I decided to batch-paint my war walkers.  I used plastic weapon components and plastic weapon shields ordered off of ebay.  I decided to magnetize the weapons - not because it allowed me to swap weapons, but because it was the only way I could figure out to attach the weapons to the warwalkers themselves.

Again, my stupid insistence on using white/purple paint schemes made me pay.  The spraying was easy but these old War Walker models (which were bought painted, stripped etc.) are really poor old casts.  A lot of mis-aligned bits and bad connections.  Overall just really miserable to paint.  I just pushed through it, and painted them.  I'm not very happy with the results though they look fine at table height.  On the flip side, I love the "look" far better than my current plastic war walkers.

This is one of those things which will probably slowly nag at me game after game until I do something about it, but I sure as hell am not going back and re-assembling/re-painting these warwalkers.

Ranting now...anyway, I've added a healthy dose of "pew pew" to my Eldar force.  War Walkers aren't useless squadron vehicles with no armour back in 2nd edition.  They can actually fight along the front sometimes.


Better pictures should follow at some point.  I took a bunch but they don't really show up that well.

Some additional pictures I took:


Wednesday, July 20, 2016

More Eldars.

Been a little down in the dumps lately, but I managed yesterday to convince myself to sit down and finish eight miniatures I had primed a couple of weeks ago.


I had a few scouts sitting around and another five Fire Dragons.  I'm actually closing in on the last of my basic infantry units.  I have a lot left to do in the army, but the infantry figures are nearing 100+.  I've got Swooping Hawks to do, and I need to eventually buy a box or two of Wraithguard.  My remaining figures are Exarchs a couple of Warlocks (might not paint them up) and some leftover guardians I'll probably turn into Pirates/Corsairs later.

Making massive progress, will try to take an army sized pictured sometime soon.

Sunday, July 10, 2016

July Army Showcase (Eldar)

I'm assembling this post for some other folks who may be looking to use some images.  This is simple a re-hash of the current units I've assembled.


Thursday, June 30, 2016

The Bloody Handed One

Disclaimer: I'm not a good painter...and I always cheat.  Unfortunately this means that occasionally you run into a large model which is way too intimidating.  Enter the Avatar.  I sure as hell can't paint fading flames or burning crevasses in this guy's body.  I just picked up some metallics and tried to ham-fist my way through this guy.

End result?  Acceptable, if not attractive.  I'm quite glad this guy is behind me now.


Hobby Haul

I'm piecing together some bits from 2nd edition.  While I'm concentrating on an Eldar army I've decided to gather up a small Imperial Agents style list as I occasionally feel the desire to paint a space marine etc.  Since I wish to use my 2nd edition figures for a variety of space skirmish games as well, I want to diversify the figures I have access too.  An Imperial Agents list will allow me some cool techmarines, random space marines, allied Sisters of Battle etc.

I'll probably kitbash Sisters of Battle from Eisenkern bodies + Statuesque Miniatures heads etc.  This is not at all a priority and is more of a "when I feel like it" force.  Not a large army either.  Transport vehicles will probably be third party, etc.


 Snagged a beautiful mint condition Sisters of Battle Codex (I'm only missing the Space Wolves and Imperial Assassins currently)


One of my favourite older figures the Terminator Chaplain.  Will likely paint him up as some kind of Inquisition figure/character or a Space Marine Chaplain on loan.  The Imperial Agents kind of idea lets you really go a little nuts with the figures etc.


Yet another Eldar War Walker which is already being stripped/filed down.
 

Tuesday, June 28, 2016

Kickstarter: Miniature Wargaming (and some metal!)

I stumbled upon this and it looks quite interesting.  It's a film about the hobby, surrounding the origins of miniature gaming and its current status.  I'll probably buy into this for a digital copy, but it looks pretty slick.  Production values look pretty good.


I've hit a bit of a speed bump as I've painted so quickly I've run out of bases...primer...and some paints.  I have a shipment from Neal over the The Warstore on the way (I hope), so I'm assembling, doing some painting where I can and stripping down incoming ebay stuff.
Here is the latest grab, a metal warwalker from 2nd edition.  I've given up on the current plastics that I put together and will be replacing them with metals from 2nd ed.  However I will be using plastic weapons and weapon shields - and possibly the rear vanes if necessary.  I just can't get over the look of the new plastic warwalkers, they're dreadful.


Friday, June 24, 2016

Step-by-Step Spiders...

I've had some people ask me general questions about how I paint figures...notably, quite quickly.  Here is the full process of reclaiming an old figure from start to finish.  Note how terrible the figure looks at certain points...and yet in the end it comes to a very reasonable table-top gaming standard.

Note:  This is not a how-to for serious painters.  But if you want to get decent figures on the table in a hurry, some steps here may aid you.


Figure received from ebay auction.


 Using clippers cut the edges of the slot itself.


This lets the slotta base fall off in two simple pieces --- this will avoid any bendage of the feed/slotta normally.


Using "Super Clean", I bathe the painted figures.  If you're not using an ultrasonic cleaner - leave them in the Super Clean for 12-24 hours and then (using gloves!) brush them with a toothbrush.


Using a simple $30 ultrasonic cleaner the process can be sped up to under an hour or so.


By the end of the Super Clean bath (and possible sonic bath) the end result should be a clean miniature.  On some metals the miniatures will turn a dark/flat grey.  This seems to be pretty normal.  However the miniature should essentially be free of paint and should appear as-new.


For this Warp Spider (models notorious for falling over) I've opted for a 30mm base instead of the normal 25mm.  I clip off the slotta-tab and file down the feet with a metal file so they fit flush to the base (textured side of the base is down).  File and clean any flash on the model at this stage as well.


Using Wood Glue Max, layer on a small amount of wood glue (I use small wood sticks to even it out).


I dip the figure/base into a mix of three sizes of ballast (seen in the previous photo).  Once dipped I carefully pat down the ballast, shake off any loose stuff and do a quick finger-wipe around the base to ensure no bits are hanging off the edge.  Allow this to dry (15-20 minutes will work for the glue I use).


The majority of figures I paint with armour will be based in a single colour of Army Painter primer/colour.  This was Skeleton Bone I believe.  Applied to the model and the base (we're going to pin down the basing material with glue...primer...dip...paint.)


Apply a standard paintjob (level of detail depends on how much I like the figure and how nice it is to paint).  You can see my infantry get simple block colour, a little drybrushing when needed --- nothing fancy.


Using some hobby pliars I dip my miniatures in Army Painter "Strong Shade" dip (kept thin with Mineral Spirits if needed).  I dip the entire model, base and all --- at this point the dip will help secure any basing material to the base.  I dip one figure at a time, using shredded bits of paper towel to draw out excess dip as it pools in certain areas.  Use shredded paper towels - not cut paper towels as the frayed edges grab dip easier.  If necessary I'll wipe areas with the paper towel or a q-tip if I need to remove some (the heads on these Warp Spiders were wiped gently with the paper towel).


This is the miniature immediately after being dipped.  Note the dip pools in recesses and automatically shades parts of the figure. It covers up a lot of mistakes!


Check back in a few minutes because sometimes large pools will appear -- the dip starts drying almost immediately.  It can take a while to get this process figured out.


Allow the dipped miniature to dry for at least 12 hours (I'd suggest overnight).  Once dried to the touch, hit it with Anti-Shine.  I use the Army Painter version, but any matte-spray will remove the shine, unless you want a shiny figure.


Using a watered down Tierra Earth from Vallejo (whatever colour you want your base) I do the whole base, edge etc.


Once dried, apply a drybrush of a colour of your choice.


To help increase the basing appearance I like to use Army Painter grass tufts as well.  I smear Wood Glue Max on a sheet of plastic (so it lays thin) and then I pinch the tuft, set the base in the glue and simply place it on the figure.


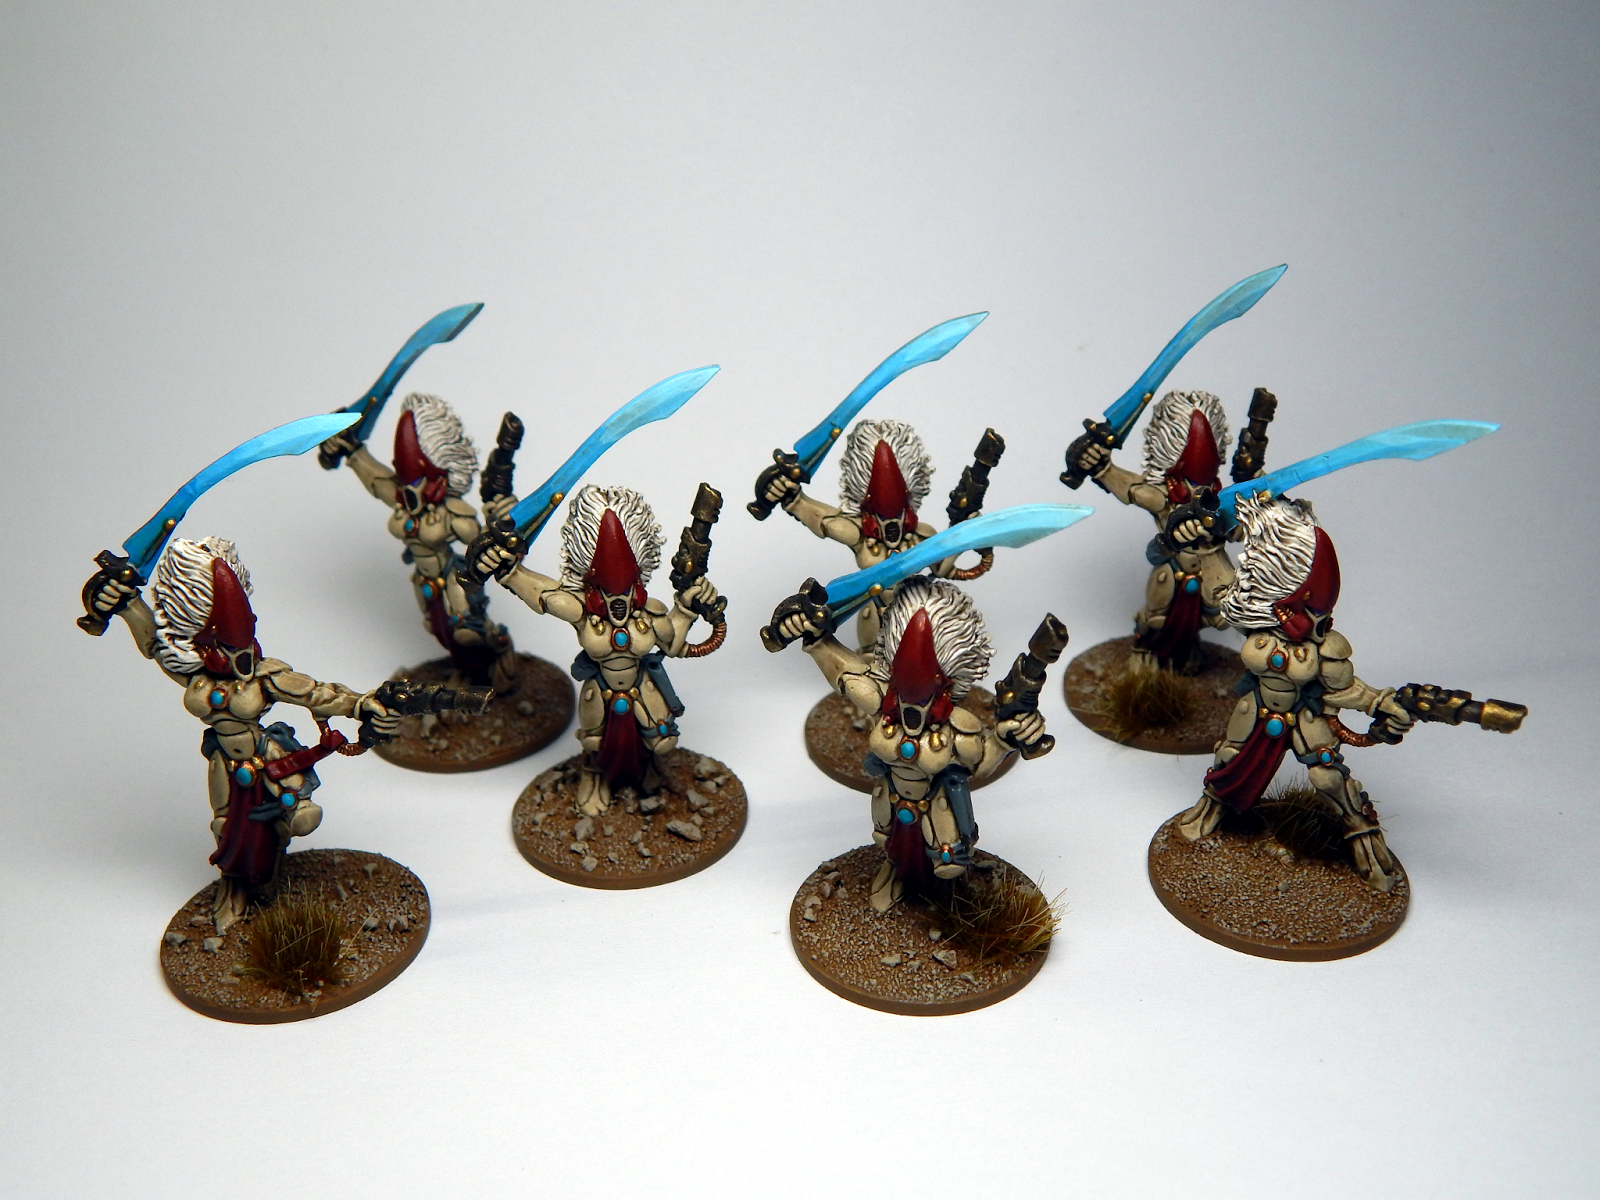
And you're done.  Cheating works!


A comparison between the ebay auction I won and the end result.